
How to Prep a Slow Cooker the Night Before: The Cold-Crock Method
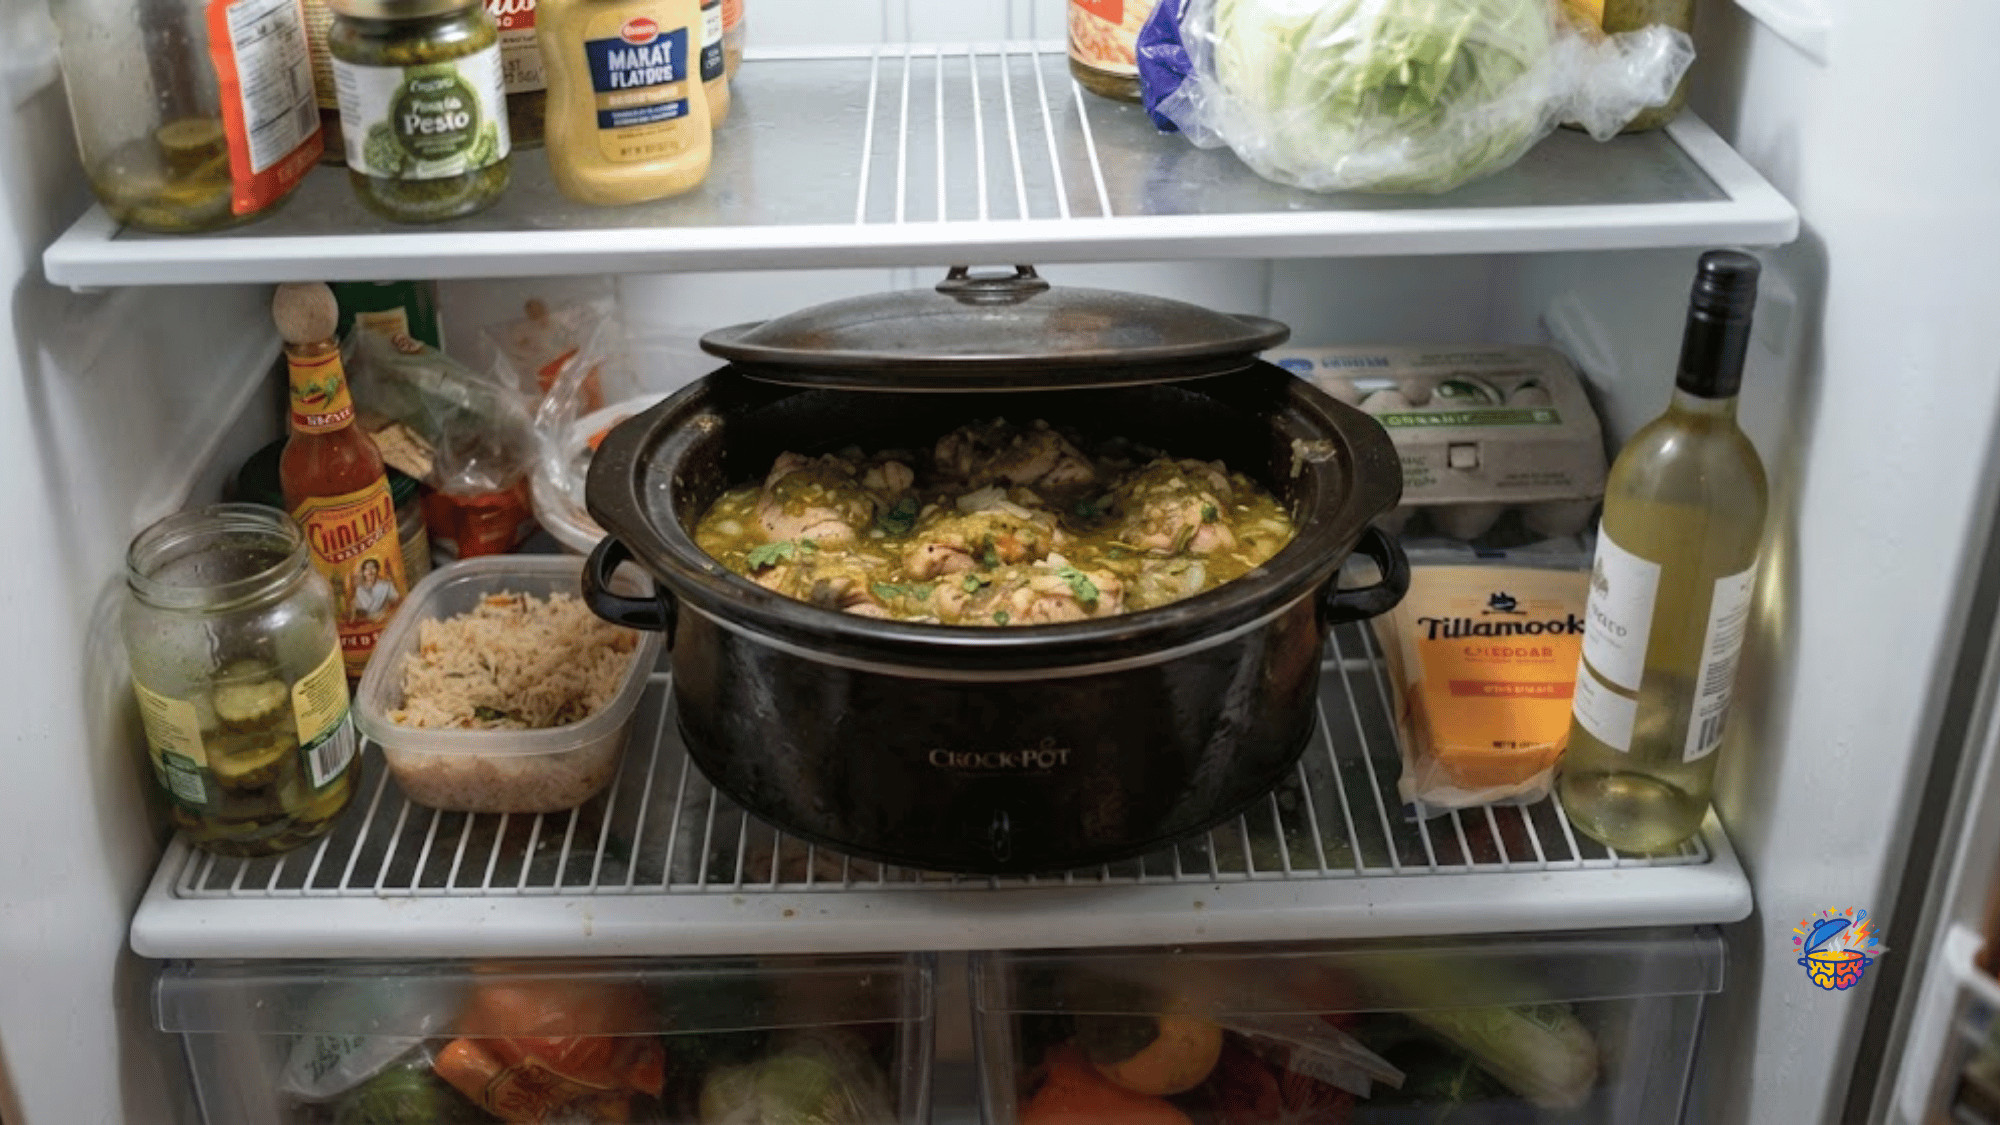



Load the insert at night, keep it in the fridge, and lift it onto the base in the morning. That is the whole method. Across 30 nights, the night load ran about four minutes. The morning start that followed ran under six, cleanup included. No delay timer, no smart plug.
The cold-crock method is a two-part sequence: the insert is filled at night and started in the morning. The insert is the removable ceramic pot that sits inside the heating base. Fill it, cover it, and put the whole insert in the fridge overnight. In the morning, lift it onto the base. Plug the cooker in and switch it on. USDA guidance is the reason the insert stays refrigerated until preparation time.
It also rules out delay timers and smart plugs for perishable food. Across 30 nights on dopakitchen, the night load ran about four minutes. No board and no knife, because nothing is chopped. The morning start that followed ran under six minutes with cleanup. A cold insert adds roughly one hour of cook time. The start time is therefore set backwards from the return time.

This is the night-before half of our tested slow-cooker start system. The full method, timing table and recovery protocol are in the 6-minute morning start system.
Why the Night Before Is the Part That Decides Everything
Set-and-forget cooking removes the supervision. It does not remove the start.
That distinction is the whole problem. A slow cooker asks for eight seconds of attention at the worst moment of the day. At 7 a.m., every extra decision is a place where the plan quietly ends. Decision fatigue explains it. The mental load of choosing and measuring peaks when your reserve is lowest. CHADD notes that differences in executive function affect the ability to begin a task.
Beginning is the expensive part, and readers with ADHD recognize that fast. So the fix is not a better recipe. It is moving the work to a time when the reserve still exists. Last night at 9 p.m., you had it. This morning you do not. Sunday batch cooking moves the work too far. By Thursday, the plan feels like a stranger’s. The night before still feels like your own.
If your afternoons are the harder end, that is a separate mechanism: late-afternoon energy dip.
How to Load the Insert Tonight: Four Steps
Four steps, five components, zero cutting tools.
- Pull the five components onto the counter. All of them first. Seeing them out stops the mid-task trip back to the fridge.
- Pour everything into the insert, protein last. Liquids first, seasoning next, meat on top. No board, no knife.
- Put the lid on. Use the dedicated lid that lives with the insert, not a plate or plastic wrap.
- Slide the whole insert onto a fridge shelf. A shelf, never the door, which is the warmest part of any refrigerator.
Be clear about what this is not. It is not Sunday batch cooking, which front-loads four hours into one day and asks Thursday to remember why. It is not a freezer dump bag, which needs thawing and therefore a decision two days early. It is not pre-cooking. Nothing is cooked at night. The insert is a container that becomes the cooking vessel eight hours later, and that is the entire trick.
The lid matters more than it looks. A covered insert stacks under other things and does not drip on the shelf below. Skipping the lid was our single most repeated mistake. The five components stay raw and cold until the base is switched on in the morning. That is the only condition the method actually depends on.

What USDA Guidance Says About Keeping the Insert in the Fridge
This part is not our opinion. It is federal guidance.
USDA FSIS is direct: perishable food stays refrigerated until preparation time. A slow cooker can take several hours to reach a temperature that destroys bacteria. Constant refrigeration is what stops micro-organisms getting a head start during those first hours. That single line settles the most popular workaround in this niche. A delay timer or a smart plug leaves raw poultry at room temperature for hours before the element switches on. The cold-crock method exists so you never need one.
FSIS also asks you to thaw meat and poultry fully, because frozen pieces climb too slowly. The appliance runs between 170 °F and 280 °F, and poultry is done at 165 °F on a thermometer. The temperature range USDA flags runs from 40 °F to 140 °F, and food should not sit inside it for longer than two hours.
Colorado State University Extension adds a fill rule: no less than half full, no more than two-thirds. Even heat needs that headroom. Note the source: that range is extension guidance, not an FSIS instruction.
How Long the Night Load and the Morning Start Actually Take
Nobody publishes these numbers, so we logged them.
| Step | Median time | Range | What made it slower |
|---|---|---|---|
| Pull the five components out | 0:50 | 0:35 – 2:15 | Broth behind the milk |
| Fill the insert, thighs last | 1:35 | 1:20 – 2:10 | A new jar of salsa verde |
| Lid on, insert onto the shelf | 1:30 | 1:05 – 3:20 | Clearing a shelf first |
| Night total | 3:55 | 3:20 – 6:40 | — |
| Morning start: out, onto the base, on | 2:05 | 1:40 – 3:35 | A tray stacked on the lid |
| Cleanup and put-away | 3:05 | 2:15 – 5:10 | A salsa ring on the shelf |
| Morning total | 5:10 | 3:45 – 9:00 | — |
Three findings sit behind that table. The night load holds near four minutes because nothing is chopped. Remove the board and the knife and you remove the step that generates cleanup. The adherence rate was 26 of 30 nights, or 87 percent. Four nights got away, which is why a recovery protocol exists at all. The cold start also costs time, and this is the number nobody publishes.
Warming a fridge-cold insert, lid and 3 lb of chicken by 30 °F takes about 152 kilojoules of extra heat. A LOW element delivering 45 to 150 watts covers that in roughly 30 to 60 minutes, depending on your cooker. Plan a full hour and set the start time backwards from when you walk in. A dinner that finishes late cannot be un-latened.
For the nights it does not happen, there is a protocol too: what to do when the crock is still cold at six.
The No-Chop Shredded Chicken Base
This recipe was chosen for one reason: every component pours.
Three things make it work from a cold crock. The liquid content is high, two cups against 3 lb of thighs, and moisture carries heat through the pot while it climbs. Thighs also tolerate a wide cook-time window. The extra half hour changes nothing you would taste, where a breast on the same schedule would dry out. And there is no dairy, which separates over a long low cook.
The proprietary measure here is the utensil count, photographed at the end. Insert, lid, measuring cup, measuring spoon, two forks. Six items in total, and four of them go straight in the dishwasher. You shred in the insert with the two forks, so no second dish is dirtied. That count, not the dinner, is the real output of the method.

No-Chop Shredded Chicken Base


Ingredients
- 3 lb boneless skinless chicken thighs
- 1 cup jarred salsa verde
- 1 cup low-sodium chicken broth
- 1 tbsp ground cumin
- 1 tsp kosher salt
Instructions
- Pour the broth, salsa verde, cumin and salt into the slow cooker insert.1 cup jarred salsa verde, 1 tbsp ground cumin, 1 tsp kosher salt
- Add the chicken thighs on top. Do not stir.1 cup low-sodium chicken broth
- Cover with the lid.
- Put the whole insert on a refrigerator shelf overnight. Not the door.
- In the morning, lift the insert onto the heating base.
- Plug in and set to LOW for 7 to 8 hours.
- Check the chicken reaches 165 °F on a thermometer.
- Shred with two forks directly in the insert.

Alex’s Tips
- Thighs only. A breast on this schedule dries out, and the cold start makes that worse.
- A cold insert runs about 30 to 60 minutes behind a room-temperature one. Set your start time backwards from dinner, not forwards from breakfast.
- Keep a second lid with the insert. The night the lid went missing is the night the shelf below got a salsa bath.
- Leftovers keep 3 to 4 days refrigerated, in shallow covered containers within two hours of finishing.
Sources and Methodology
The timing figures come from one household log: 30 nights of loading, 21 timed mornings, a Traceable digital timer, one cooker, one recipe. It is a small sample from one kitchen, not a controlled study. The cook-time offset is arithmetic, not a stopwatch reading. It is mass times specific heat times a 30 °F rise, divided by the LOW output on the rating label.
What did not go as planned. The first three nights, I loaded the insert and left it on the counter. That is exactly what the USDA sheet rules out, and the insert went back in the fridge. Two later nights, the lid was left off and the fridge shelf above dripped. A second lid now lives with the insert. Neither problem showed up in any recipe. Both showed up on night one.
- USDA FSIS — Slow Cookers and Food Safety, revised February 2012.
- USDA FSIS — The Temperature Range 40 °F–140 °F, August 2026.
- USDA FSIS — Safe Minimum Internal Temperature Chart, August 2026.
- Colorado State University Extension — Crockpot and Slow Cooker Food Safety, updated November 2025.
- ASHRAE Handbook — Refrigeration, Thermal Properties of Foods (specific-heat values used above).
What to Remember
- The insert goes in the fridge, not on the counter, and not on a timer.
- Nothing is chopped, so the night load stays around four minutes.
- A cold insert cooks slower, so set the start time backwards from when you get home.
- If tonight does not happen, tomorrow has a protocol too.

Assisted by AI, reviewed by our human editorial team. View our Pages : Editorial Promise / Methodology / Disclaimer. This article is for informational purposes only and does not constitute medical or nutritional advice.


